How to Fix a Damaged Retaining Wall: Complete Homeowner’s Guide

Most retaining wall problems don’t happen overnight. A crack shows up here. A section starts leaning slightly there. A few blocks shift out of place after a wet spring. It’s easy to look at these things and tell yourself it’s not that bad yet.

The issue is that retaining walls rarely get better on their own. What starts as a cosmetic problem usually has a structural cause underneath it, and that cause keeps doing its thing whether you address it or not. Knowing how to fix a retaining wall, and more importantly when and why, is what keeps a manageable repair from becoming a full rebuild.

This guide walks through how to read the warning signs, how to approach common repairs, and how to stop the same problems from coming back.

Signs Your Retaining Wall Needs Repair

Before you can figure out how to fix a retaining wall, you need to know exactly what you’re dealing with. These are the signs that tell you repair is overdue.

Leaning or tilting forward. A wall that’s moved out of plumb needs attention, even if the movement seems small. Small lean now becomes larger lean without intervention.

Horizontal cracking. This type of crack is particularly serious in concrete or block walls. It indicates the wall is bending under load, which means the forces acting on it are exceeding what it was designed to handle.

Bulging sections. A leaning wall indicates issues with its foundation or excessive soil pressure behind it. Bulging is essentially a localized version of the same problem.

Frost heave damage. In Canadian climates, frost heave is a common cause of wall movement. Frost heave occurs when water in the soil freezes and expands, causing the wall to shift or crack. Look for unevenness or raised sections. If your wall has shifted annually and come back close to its original position each spring, it may have been managing frost movement reasonably well. If it’s not coming back, that’s a different issue.

Soil separation at the base. A gap forming between the base of the wall and the surrounding soil usually means the base has shifted or settled.

Retaining Wall Repair Vs Replacement: How To Decide

Not every damaged retaining wall needs to be rebuilt. But not every damaged retaining wall can be effectively repaired either.

A few questions help clarify the decision. Is the damage localised or widespread? Is the base still stable? Was there ever a proper drainage system, and is it still functioning? What caused the damage in the first place?

If the damage is isolated, the base is solid, and you can fix the cause, repair is the right approach. If the wall has fundamental problems, either in how it was originally built or in the drainage system behind it, repair is likely to be a temporary solution. A rebuild done right is almost always more cost-effective over a ten-year view than repeated repairs to a wall that wasn’t built to last.

How To Fix A Leaning Retaining Wall

The approach to fixing a leaning retaining wall depends on how much it’s leaning and what’s behind the lean.

Small amounts of lean in walls that are otherwise stable can sometimes be addressed with tie-back systems that anchor into the hillside and pull the wall back toward vertical. These work well when the base is solid and the lean is early.

More significant lean, or lean accompanied by cracking or base movement, usually means the wall needs to come apart and go back together properly. That sounds like a bigger undertaking than it often is for smaller walls. The proper repair process involves removing damaged blocks in a V-shape pattern going two blocks wider than the damaged area, excavating old backfill material, rebuilding the base with drainage stone, and reinstalling blocks one course at a time while checking level and backfilling with clean angular gravel.

Cap blocks go on last, secured with masonry adhesive. Then the drainage system behind the wall keeps it where it’s supposed to be.

How To Fix Cracks In A Retaining Wall

Cracks in retaining walls range from cosmetic to structural, and treating a structural crack as cosmetic is one of the more common repair mistakes homeowners make.

Surface cracks in mortar joints are generally easy to address. Clean out any loose material, apply the right type of exterior masonry repair product, and the job is done. These cracks don’t usually indicate movement and don’t usually recur if the drainage is functioning correctly.

Cracks that go through the face of a block or stone, that run horizontally across the wall, or that have any visible displacement between one side and the other are different. These indicate the wall has moved. Filling the crack without addressing the movement means you’ll be back looking at the same crack, or a worse one, in a season or two.

Retaining Wall Drainage Repair

More retaining wall problems trace back to drainage than to any other single cause. Poor drainage is responsible for about 60% of leaning retaining wall problems. If you’re repairing a wall without improving the drainage behind it, you’re likely to be back doing the same repair.

A properly functioning drainage system behind a retaining wall includes three things: a perforated drainage pipe at the base of the wall, a layer of free-draining gravel (at least 12 inches thick) behind the wall face, and geotextile fabric to keep soil from migrating into the gravel layer.

Weep holes in the wall face need to be clear and functional. Improving drainage means ensuring proper grading and cleaning weep holes to prevent water pressure buildup. If weep holes are blocked, water builds up behind the wall regardless of how good the drainage layer is.

How To Prevent Future Retaining Wall Damage

Preventing retaining wall damage is mostly about not ignoring the things that cause it.

Check the wall periodically. You don’t need an engineer twice a year; a homeowner walkthrough that looks for changes is enough. Cracks that are new. Any section that looks different from how it looked six months ago. Water marks on the face of the wall that weren’t there before.

Keep drainage outlets clear. Blocked weep holes and clogged drainage pipes allow water to build up behind the wall, and water pressure is the primary cause of wall failure. Filling cracks with sealant using masonry caulk for minor cracks halts further damage and should be done promptly.

Watch what goes on top of the wall. Adding soil, large planters, or hardscape close to the top edge increases the load the wall is carrying. Any significant addition above a retaining wall is worth thinking about before it goes in.

When To Call A Professional

Some retaining wall repairs are within reach of a capable homeowner. Others genuinely aren’t, and recognizing the difference matters.

Call a professional when the wall is leaning more than a couple of inches along any significant section. When cracks are wide, horizontal, or showing any displacement. When the wall is over four feet tall and showing structural issues. When the wall is near a foundation, a driveway, or any structure that would be at risk if the wall failed. When multiple repair attempts haven’t held.

When the wall leans to more than a few inches or holds a driveway, patio or building, call a structural engineer or wall contractor. Home-based repairs may alleviate the situation for some time but it is a matter of safety.

Conclusion

Most retaining wall damage is fixable. Most retaining wall repairs that fail are ones that addressed the visible symptom without fixing the underlying cause.

Get the drainage right. Get the base right. Fix what’s actually wrong, not just what looks wrong. And inspect the wall on a schedule so small issues don’t become expensive ones.
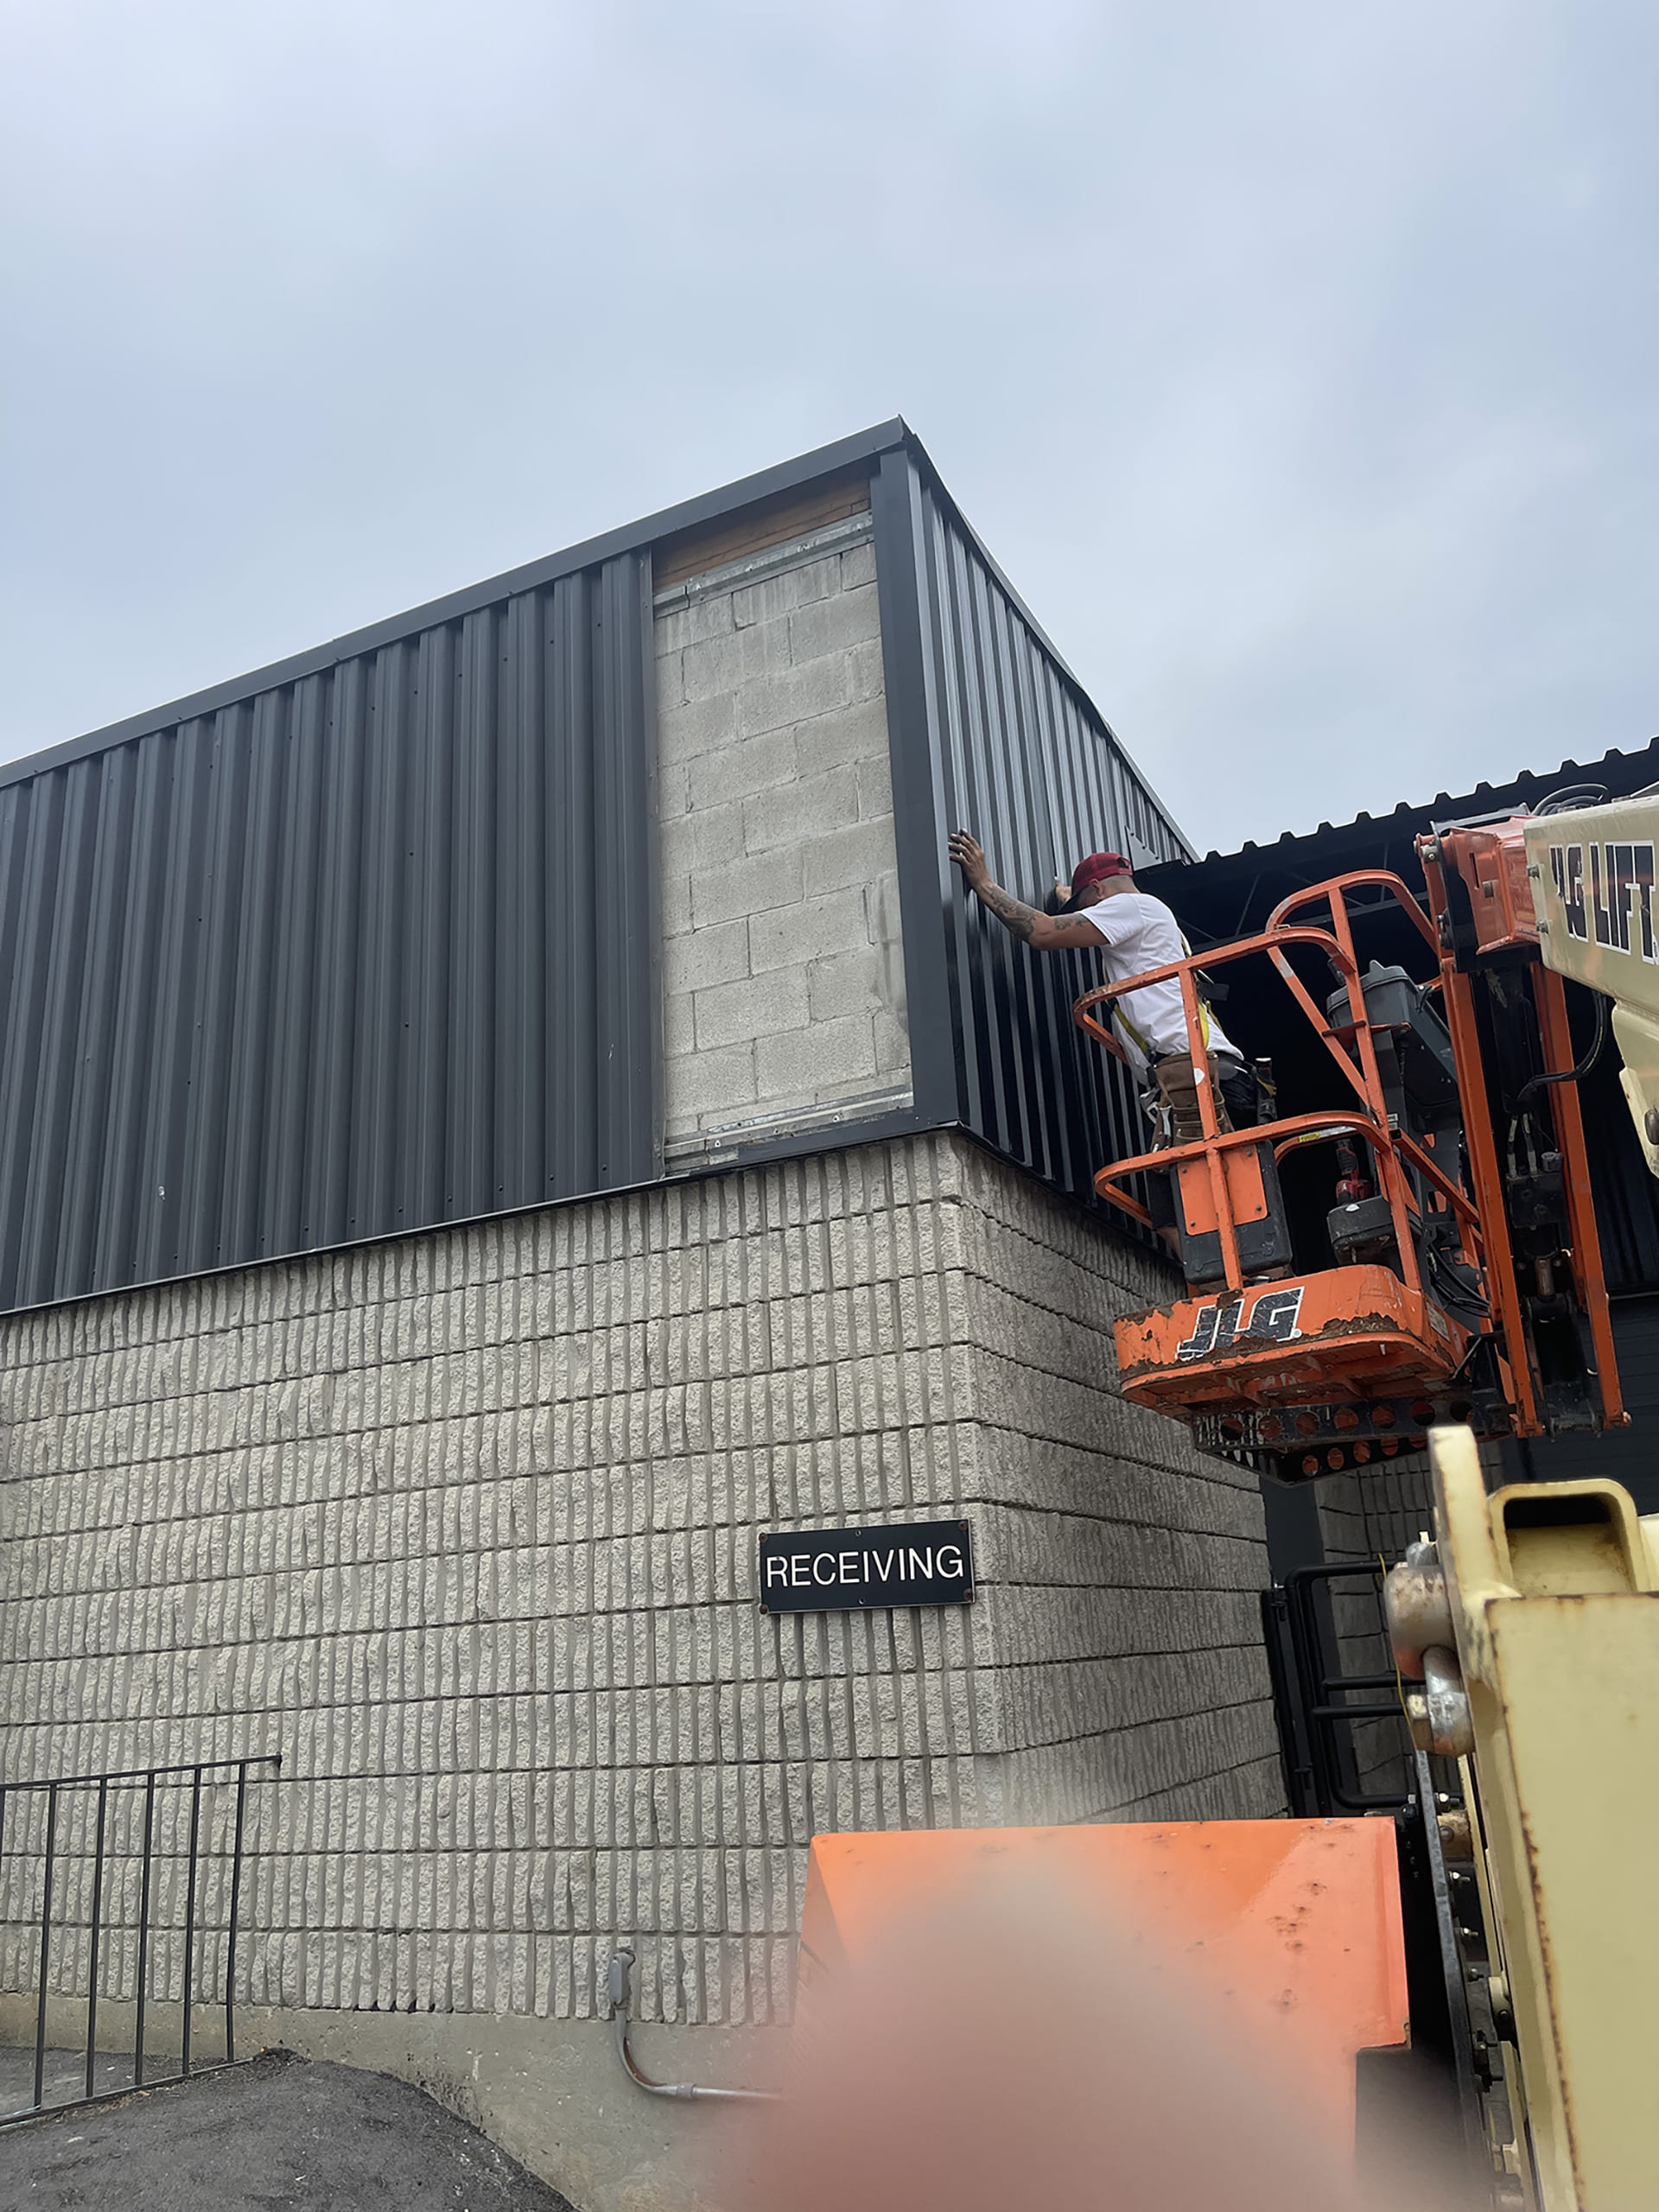
How to Excavate a Construction Site: Step-by-Step Guide

If you’ve ever watched an excavation project from the road and wondered what exactly is happening out there, the honest answer is: more than it looks like.

Soil gets assessed. Utilities get located. Plans get verified against real site conditions. Equipment gets selected based on what the ground actually needs. Safety systems go in place. Then, and only then, does the digging start.

This guide covers how to excavate a construction site the right way, from the first site walk to the finished, compacted base that everything else relies on.

What Is Construction Site Excavation?

Construction site excavation is the foundational phase of any build, literally. It’s the process that takes raw or existing land and transforms it into a site that can support a structure safely for its entire lifespan.

Understanding how to excavate a construction site correctly can mean the difference between a solid long-lasting structure and expensive structural problems later.

The work involved spans soil assessment, utility management, site clearing, grading, foundation and trench excavation, drainage management, and compaction. Each phase feeds into the next. Getting one wrong creates problems that compound through everything that follows.

When Does A Construction Site Need Excavation?

The short answer is: almost always. Virtually every construction project touches the ground, and virtually every ground-touching project requires some form of controlled excavation.

New builds need foundations. Foundations need excavated bases. Utilities need trenches. Drainage systems need shaped channels. Roads and driveways need prepared subgrades. Retaining structures need excavated footings. Each of these is an excavation task, and each of them affects the performance of whatever’s built on or around it.

Planning Before Excavation

The work that happens before the first machine arrives on site is what determines how the excavation itself goes. Skipping or rushing the planning phase is one of the most reliable ways to create expensive problems mid-project.

Site assessment is first. What are the soil conditions? Is there groundwater to manage? What are the site’s existing grades? Are there any buried obstacles or old foundations? Before a single scoop of dirt moves, you need a clear plan. Get a professional land survey of the property boundaries and existing structures. Mark exact locations for foundations, basements, septic systems, and utilities. Identify soil type because each behaves differently when dug.

Utility location is non-negotiable. In Canada, contact your local utility notification centre (Ontario One Call, BC One Call, etc.) before any digging begins. Utilities will be marked at no cost. Hitting an unmarked utility line is dangerous, expensive, and entirely preventable.

Permits come next. Most municipal excavation work requires permits before you start. Knowing what’s required and having approvals in place before equipment arrives avoids costly delays.

Step-By-Step Construction Site Excavation Process

Here’s how a professional excavation unfolds from start to finish.

Step 1: Site clearing. Vegetation, existing structures, debris, and anything else that needs to come out gets removed before excavation begins. Topsoil is often stripped and stockpiled separately for reuse during final landscaping.

Step 2: Layout and marking. Foundations, trenches, and excavation boundaries get marked on the ground using stakes and string lines. This is the step that translates the plan into physical markers the equipment operators work to.

Step 3: Excavation. Smart contractors dig in planned lifts, usually 4 to 8 feet at a time, and stockpile topsoil separately for later landscaping use. Spoil piles must be kept at least 2 feet back from the edge so they don’t fall in or overload the sides. 

Step 4: Shoring and safety. For deeper excavations, protective systems go in as the dig progresses. Benching creates giant steps in the side walls. Trench boxes or shoring uses steel or aluminum shields that protect workers inside. 

Step 5: Foundation and utility preparation. Once the excavation is at depth, foundation footings get formed, utility trenches get dug, and drainage systems get installed.

Step 6: Backfilling and compaction. Once underground pipes are laid and foundations are poured, the excavation must be closed. You cannot use organic topsoil for this. You typically need engineered structural fill. You must mechanically compact it. Soil supporting building foundations usually must hit 95 to 98 percent of the maximum Proctor density. 

Step 7: Final grading. The finished site gets graded to the design profile, with slopes that direct surface water away from the building and toward appropriate drainage outlets.

Construction Site Excavation Safety Tips

Excavation is one of the higher-risk phases of construction, and the safety measures that apply aren’t optional. Here are the ones that matter most.

Locate utilities first, every time. Before any digging starts. No exceptions.

Assess soil conditions daily. Every morning and after rain, someone trained in soil classification and protective systems must walk the excavation and look for cracks, water seepage, or falling rocks. Fix problems immediately.

Use protective systems in deeper excavations. Never take shortcuts here. A cubic yard of soil weighs about 3,000 pounds, enough to crush a person instantly. Sloping, benching, and trench boxes are all acceptable systems depending on soil conditions and excavation geometry.

Keep spoil piles back from edges. Spoil piles and heavy machinery must be kept at least 2 feet back from the trench edge. This prevents extra surcharge weight from collapsing the walls.

Maintain egress from trenches. If the hole is deeper than 4 feet, you need ladders, ramps, or steps no more than 25 feet apart so workers can get out fast in an emergency.

Equipment Used In Construction Site Excavation

The equipment on an excavation site depends on the scale and nature of the project, but some machines appear on almost every job.

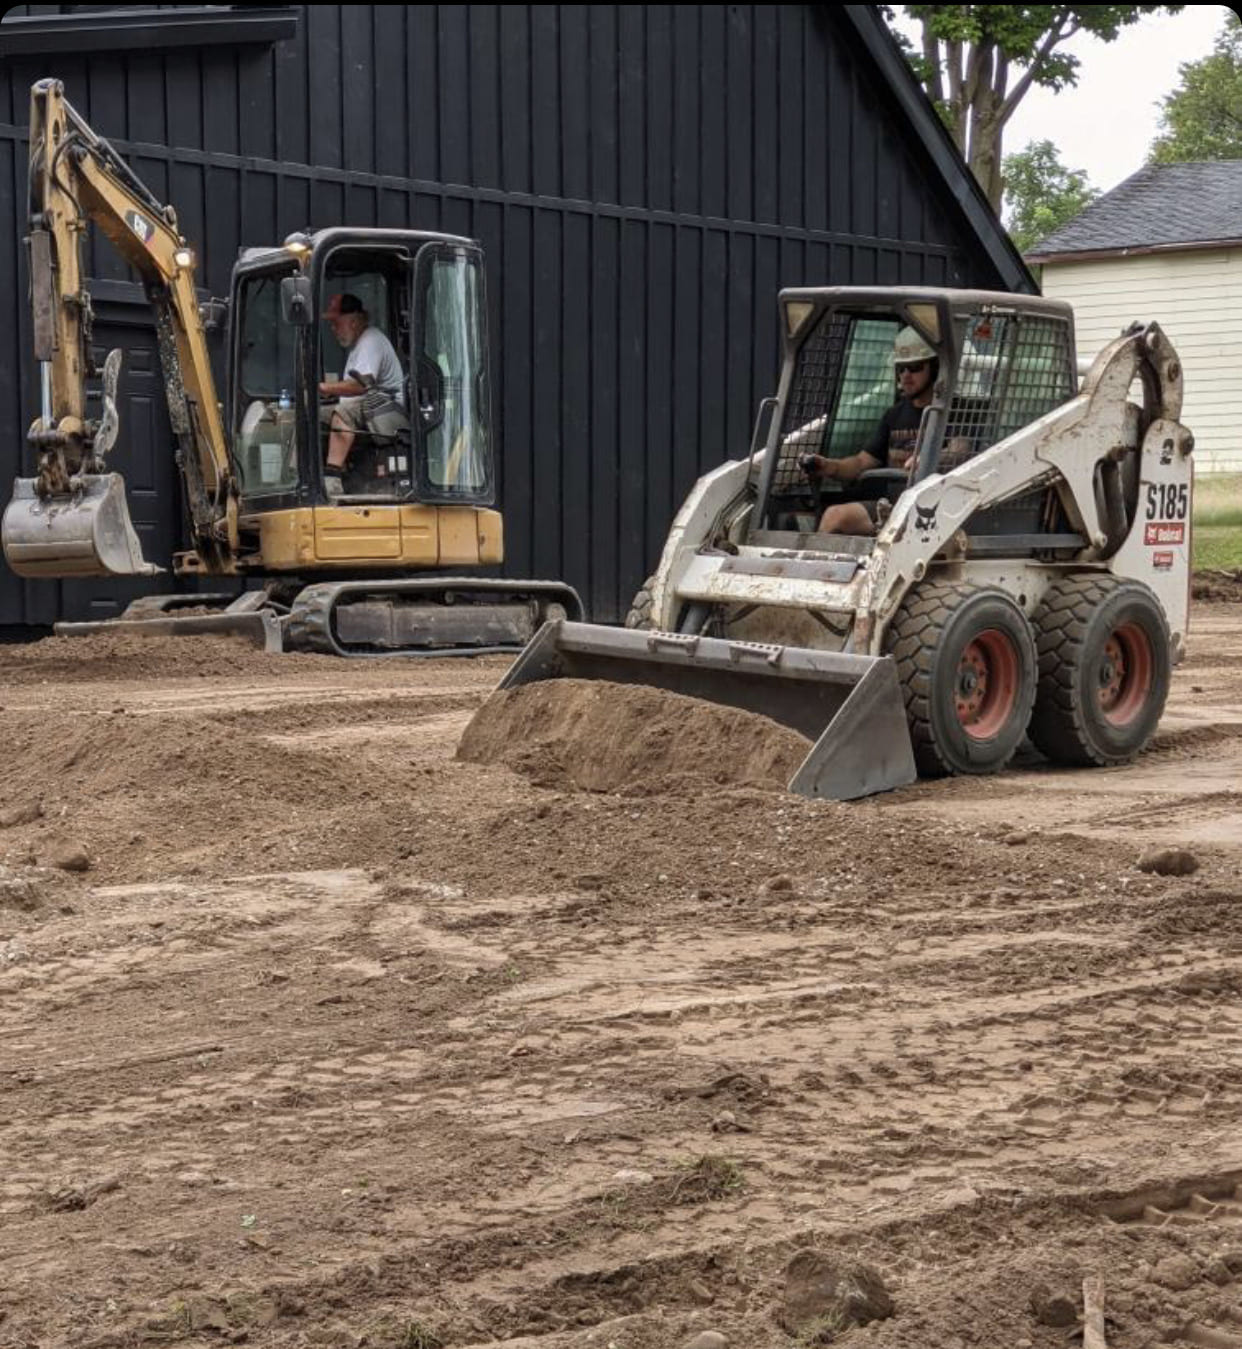
Hydraulic excavators handle most of the digging. Versatile enough to excavate foundations, trenches, and large cuts, they’re the workhorse of any serious excavation. Bulldozers clear and grade. Skid steers and compact loaders work in tighter spaces. Dump trucks haul spoil continuously. Compactors finish the base layers.

Larger or more complex projects add specialized equipment. Dewatering pumps manage groundwater. Drilling rigs install shoring systems. Grade lasers and GPS guidance systems improve precision on sites where elevation tolerances are tight.

Conclusion

Excavation done right is invisible in the finished project. The foundation sits level. The drainage works. The utilities are where they should be. The ground doesn’t settle.

All of that happens because someone planned the excavation carefully, executed it in the right sequence, and didn’t cut corners on safety or compaction. That’s what good construction site excavation looks like from the inside.

Commercial Property Maintenance Checklist: The Ultimate 2026 Guide

Walk into a well-maintained commercial building and you don’t notice the maintenance. The lighting works. The HVAC keeps a consistent temperature. The common areas are clean and in good repair. The safety systems are functional and documented.

Walk into one that isn’t being properly maintained and you notice everything. None of what you notice reflects well on the property or the management.

Commercial property maintenance done right is invisible. This guide covers how to get there, with a practical checklist that covers every major system and surface that a commercial property manager needs to stay on top of.

What Is Commercial Property Maintenance?

Commercial property maintenance is the ongoing work of keeping a non-residential building and its systems safe, functional, compliant, and in good condition. It covers everything from daily cleaning and garbage collection to annual engineering inspections and emergency response.

Commercial building maintenance includes routine inspections of HVAC systems, plumbing, electrical wiring, and structural components such as roofs and windows. The routine maintenance schedule should include daily, weekly, monthly, and yearly tasks.

The distinction from residential maintenance is scale, complexity, regulatory weight, and the number of people depending on the building functioning properly every day. A missed filter change in a residential HVAC system is an inconvenience. A missed service on a commercial system serving a hundred people in an office building is a different category of problem.

What Services Are Included In Commercial Property Maintenance?

The service list for a commercial property is broader than most people expect when they first take on property management responsibilities.

Mechanical systems. HVAC, plumbing, electrical, elevators, and any building automation systems. These need scheduled servicing, not just reactive repair.

Building envelope. Roof, exterior walls, windows, doors, and all the sealing and waterproofing that keeps weather out. Annual inspections minimum, with immediate response to any identified deficiencies.

Fire and life safety. Fire suppression systems, alarm systems, emergency lighting, exit signage, fire extinguishers, and evacuation plans. These aren’t optional and they’re all regulated with specific inspection and documentation requirements.

Cleaning and janitorial. Common areas, restrooms, lobbies, parking structures, and any spaces shared by multiple tenants.

Grounds and exterior. Landscaping, snow and ice management, parking lot maintenance, exterior lighting, and any drainage management on the property.

Compliance management. Staying on top of permit requirements, mandatory inspections, regulatory changes, and documentation that demonstrates compliance.

Commercial Building Maintenance Checklist: 9 Essential Steps

1. HVAC System Maintenance

Commercial HVAC maintenance is one of the highest-priority items on any building manager’s list. Tenant complaints about temperature and air quality are among the most common in commercial buildings, and most of them trace back to HVAC maintenance gaps.

Monthly filter checks and changes. Quarterly inspection of mechanical components and drainage. Annual full service by a qualified refrigeration mechanic. Seasonal damper and controls adjustments for changeover. Belt and bearing checks on air-handling units. Coil cleaning when required.

Document every service visit. HVAC service history is useful for warranty purposes, budgeting, and demonstrating due diligence if a system failure results in a complaint.

2. Plumbing System Maintenance

Commercial plumbing serves a lot of users. The wear that is produced in fixtures, drainage systems, and water supply components is proportional.

Monthly fixture inspections and drain condition checks. Annual backflow preventer testing with certification, which is a regulatory requirement in most Canadian municipalities. Water heater service on a schedule based on age and capacity. Pipe inspection at appropriate intervals for older buildings.

3. Electrical System Maintenance

Electrical maintenance in a commercial context has two components: keeping the systems operational and maintaining the documentation that proves compliance with regulatory requirements.

Emergency lighting testing requirements under provincial fire codes are specific and non-negotiable. Exit sign inspections. Load monitoring on distribution panels. Surge protection systems. Generator testing if the building has backup power.

For commercial properties with significant tenant electrical loads, having a qualified electrical contractor on the maintenance roster who knows the building is worth the relationship-building investment.

4. Roof and Building Envelope

The roof and building envelope protect everything inside the building. When they fail, the damage cascades quickly into interior finishes, mechanical systems, and tenant spaces.

Two formal roof inspections per year are the standard for commercial properties: spring to assess winter damage and fall before wet weather and freeze-thaw cycles begin. After any significant weather event, an additional inspection of vulnerable areas is worth doing.

Building envelope inspection covers not just the roof but all exterior cladding, window seals, door seals, penetrations, and expansion joints. Any point where water could enter the building envelope is a maintenance point.

Asset preservation through regular maintenance extends building lifespan and protects property value over the long term. The roof and building envelope are the most direct example of that principle in action.

5. Fire and Life Safety Systems

Fire and life safety systems are the most legally regulated part of commercial property maintenance in Canada. The requirements vary by province and building type, but the principle is consistent: these systems must be tested, maintained, and documented on a mandatory schedule, and the records must be available on request.

Fire suppression system testing and inspection. Fire alarm system testing. Emergency lighting testing. Exit sign inspection. Fire extinguisher inspection and certification. Evacuation plan currency. Fire access route maintenance.

Fire alarm testing, elevator inspections, backflow prevention, emergency lighting are all legally mandated with documented proof required.

These aren’t items where you decide the schedule based on budget. The schedule is set by code. Falling behind on mandatory inspections creates liability exposure and potential occupancy issues.

6. Elevators and Vertical Transportation

Elevators in commercial buildings are subject to mandatory inspection and certification requirements under provincial legislation across Canada. These aren’t discretionary maintenance items.

Elevator inspections are mandatory and must be conducted on schedule.

Beyond the mandatory inspections, elevators benefit from regular preventive maintenance by a qualified elevator mechanic. Cab interior maintenance, door alignment and operation, emergency phone testing, and lighting are all regular maintenance items.

Elevator downtime in a multi-storey commercial building is a significant tenant relations issue. A maintenance programme that prevents failures is far less disruptive than reactive repair.

7. Grounds and Exterior Maintenance

Commercial exterior and grounds maintenance covers a lot of territory: landscaping, snow and ice management, parking lot maintenance, exterior lighting, drainage management, and building perimeter condition.

For commercial properties in Canada, the winter maintenance programme needs to be in place before the first snow. Snow removal contracts should be arranged in advance, de-icing materials should be stocked, and response protocols should be documented.

Parking lot condition inspections in spring and fall, with crack sealing and pothole repair as needed, keep the surface manageable and reduce liability exposure from trip and fall incidents.

8. Cleaning and Janitorial Services

Cleaning in commercial properties is a scheduled, documented service, not just a response to when things look visibly dirty. The standard that tenants expect is one of consistent, professional cleanliness throughout the common areas they use daily.

Daily cleaning of common areas, washrooms, and entrance areas. Weekly floor care for lobbies and corridors. Monthly window cleaning. Deep cleaning on a scheduled basis for higher-intensity areas. Waste and recycling management coordinated with municipal collection schedules.

Pest control is often managed alongside cleaning and janitorial services. Regular pest inspections and preventive treatment are standard in commercial buildings, particularly food service and retail properties.

9. Maintenance Documentation and Compliance Records

Documentation serves three practical purposes in commercial property management.

It proves compliance when regulators ask. It protects the property owner and manager in the event of an incident. And it provides the maintenance history that makes future planning and capital budgeting possible.

Every inspection, service, test, and repair should be logged. Certificates for regulated systems should be kept current and accessible. Deficiency reports and the corrective actions taken in response should be documented. Vendor contracts and service records should be filed systematically.

Many landlords approach commercial property maintenance reactively rather than proactively. The properties with documented, structured maintenance programmes consistently outperform reactive ones in tenant retention, compliance, and long-term value.

Conclusion

A commercial property that’s well-maintained practically runs in the background. Systems work. Tenants don’t complain. Regulators find nothing to flag. The building holds its value and attracts the kind of tenants who take care of their space.

That outcome is the result of a maintenance programme that’s planned, scheduled, executed, and documented. This checklist is the starting point for building one.

Top 15 Property Maintenance Solutions for Your Property 

Keeping a property in good condition isn’t one big task. It’s a lot of small ones, done on a schedule, before they have the chance to become expensive ones.

This guide covers 15 property maintenance solutions that cover the major systems and surfaces of any property, with enough detail to actually be useful when you’re planning out your maintenance calendar.

The Crucial Role Of Property Maintenance

The financial case for regular maintenance is easy to make. Fixing something before it fails costs a fraction of what it costs after. That principle applies to every system in a building.

Beyond cost, there’s safety, compliance, and tenant or occupant satisfaction. A property that gets consistent attention is safer to live or work in, easier to rent, and far less likely to generate emergency calls at inconvenient hours.

When maintenance gets pushed down the priority list, it doesn’t disappear. It accumulates. And when that accumulated list eventually demands attention, it’s longer, more expensive, and more disruptive than it would have been if it had been handled progressively.

The best property maintenance approach isn’t reactive. It’s proactive, seasonal, and built on a system rather than a response to whatever just broke.

Essential Property Maintenance Solutions

 1. Regular HVAC Servicing 

Most HVAC failures don’t happen suddenly. They happen after months of reduced airflow, dirty coils, and overworked components. Filter changes are cheap and fast. Professional servicing once a year catches the things a filter change doesn’t. Put both on a schedule and the system runs well for years. 

2. Plumbing Inspection and Leak Detection 

Water damage is expensive and quiet. A slow drip under a cabinet, a slightly weeping pipe joint, a seal that’s just starting to fail. None of these announce themselves loudly. They just keep going until someone notices the damage they’ve already done.

Walk through and check under sinks, around appliances, and at the water heater periodically. Check water pressure. Look for any staining on ceilings or walls that wasn’t there last time. Catching a leak early is a completely different repair bill than catching it late. 

3. Roof and Gutter Maintenance 

Two inspections a year covers most properties. Spring to assess winter damage and fall before the wet season arrives. Check for missing or lifting shingles, damaged flashing, and signs of moss or water pooling. Clear gutters and downspouts at both inspections.

Blocked gutters are one of the most common causes of water damage that finds its way into walls and foundations. It’s also one of the easiest things to prevent with a ladder and an hour of time.

4. Electrical System Checks 

Electrical issues are a safety concern before they’re a maintenance concern. Flickering lights, outlets that feel warm, breakers that trip frequently. None of these are things to watch and wait on. Regular panel checks, annual detector testing, and prompt attention to anything unusual keep the electrical system safe and functional. 

5. Exterior Paint and Sealant 

Paint and caulking are the first line of defence against moisture getting into your building envelope. When they start to fail, the problems that follow are more expensive than the paint. Annual inspection and resealing at joints and penetrations is one of the more cost-effective best property maintenance habits you can build.

Most exterior maintenance is cheap when it’s done on schedule and expensive when it’s deferred. Checking and refreshing exterior sealants and paint before they fully fail is one of those simple habits that prevents a cascade of more serious issues.
 

6. Pest Control 

Pest control belongs in the preventive column, not the reactive one. Termite damage especially happens slowly and silently. An annual professional inspection combined with basic prevention measures keeps infestations from becoming structural problems.

7. Drainage and Grading 

Water that moves away from the building is water that isn’t doing damage. Drainage and grading issues tend to develop gradually and show up as wet basements, water pooling near the foundation, and landscapes that stay saturated after rain. Checking that ground slopes away from the building and that drainage paths are clear is part of a complete best property maintenance routine.
 

8. Window and Door Seals 

Weatherstripping and window caulking degrade over time without much visible warning. Building an annual check into your best property maintenance schedule keeps heat in and moisture out, which benefits both energy bills and the building envelope.

9. Safety System Testing 

Safety systems are the ones people test least often because they rarely seem urgent. Making them a fixed part of the maintenance schedule removes the guesswork. Monthly detector tests take about two minutes and they’re not optional.

The worst time to find out a safety system isn’t working is when you need it. Regular testing on a set schedule, not whenever someone remembers, is what keeps these systems actually functional.

10. Landscaping and Grounds 

Regular grounds maintenance keeps the property safe, functional, and presentable. Trees near the building should be checked for dead or overhanging branches. Drainage in the yard connects directly to drainage around the foundation. Cracked pavement needs attention before freeze-thaw cycles make it worse.

Landscaping maintenance that includes structural considerations like tree health, drainage, and hardscape conditions is more valuable than maintenance focused only on appearances. What the yard looks like matters less than what it’s doing to the building underneath it. 

11. Foundation Checks 

Include foundation checks in annual walkthroughs. What you’re looking for is change. New cracks, widening existing ones, signs of moisture in areas that were dry before. These are early signals that something is worth looking at before it becomes a structural issue.

Most foundation problems become obvious to the naked eye well before they become structural emergencies. That early window is when repairs are most straightforward and least expensive. Checking periodically and noting changes is what keeps that window open. 

12. Water Heater Maintenance 

Water heaters have a finite lifespan and they give signals before they fail. Sediment buildup reduces efficiency and shortens that lifespan. Annual flushing removes sediment and extends the unit’s life. Check the pressure relief valve at the same time. A water heater that fails without warning is an inconvenient expense. One that’s been maintained goes on schedule at the end of a long, efficient life. 

13. Preventive Maintenance Scheduling 

A maintenance schedule takes the work out of remembering what needs doing and when. Monthly tasks for safety and common area checks. Quarterly for mechanical systems and exterior walkthrough. Annual for professional services and structural review. Put it on a calendar and it runs itself.

Building a maintenance schedule is what turns a list of best property maintenance intentions into actual work that gets done. Even a basic one-page calendar with tasks grouped by frequency is far more effective than trying to keep track of everything in your head. 

14. Vendor Relationships

The contractors you call when something goes wrong should be contractors you’ve already worked with. Finding a good plumber or electrician for the first time during an emergency is one of the more stressful ways to spend a day. Build those relationships during non-emergency work and they’re there when you need them.

A vendor network is a maintenance tool. The plumber you call for a non-urgent job, who knows your property and your systems, is a very different experience from the first available contractor on a Saturday morning. Investing in those relationships as part of your best property maintenance approach pays off reliably. 

15. Documentation and Record Keeping

Every maintenance task that gets done should get recorded. Date, vendor, cost, and any relevant photos or notes. That record becomes the most useful thing you have when you’re budgeting for next year, dealing with a warranty claim, or trying to explain the property’s maintenance history to an insurance company or a buyer.

Documentation turns a maintenance effort into a maintenance history, and a maintenance history has real value. For compliance, for insurance, for resale, and for your own planning. Take photos. Log dates and costs. Keep it somewhere you can find it. 

Elevate Your Property Maintenance Game

Taking your best property maintenance approach from reactive to proactive is mostly a planning exercise. Once the schedule is built and the habits are in place, it runs with much less effort than managing a never-ending list of deferred repairs.

The best property maintenance isn’t complicated. It’s consistent. A system that catches small things before they become big ones, backed up by records that tell you what’s been done and what’s coming next. Build that system and the property looks after itself more than it demands attention. 

Simple Property Maintenance Solutions That Prevent Costly Repairs

Property maintenance done well is invisible. You don’t notice the roof that doesn’t leak, the HVAC that runs quietly, the foundation that stays dry. You only notice when those things fail. The solutions in this list are what keep them from failing.

None of these solutions are complicated. What they require is consistency. A property that gets looked after on a schedule, with good records and reliable vendors, is a property that holds its value and avoids the kind of costs that come from leaving things too long. 

Retaining Wall Calculator: How to Calculate Blocks for a Retaining Wall

Planning a retaining wall and trying to figure out how many blocks to buy is one of those tasks that sounds simple until you actually sit down to do it. Too many and you’re wasting money on materials that sit in your garage. Too few and you’re making an extra trip to the supply store mid-project, which nobody wants. 

A retaining wall calculator takes the guesswork out of it. Instead of estimating, you’re working with real numbers based on your actual wall dimensions and block size. This guide walks you through how to use one, how to do the math yourself, and what else to factor in so you’re not caught off guard at the supply yard.

How Many Blocks Do You Need For A Retaining Wall?

The number of blocks you need comes down to two things: how big your wall is and how big your blocks are. 

To estimate the total number of retaining wall blocks, divide the wall’s width in inches by the block width to get the number of columns, and divide the wall’s height in inches by the block height to get the number of rows. Multiply the columns by the rows to find the total block count. 

Most people also forget to account for the first course going partially below grade, which affects your height measurement. Most experts suggest embedding the first course of blocks below grade about 10% of the wall height to support it correctly. For example, if the desired wall height is 6 feet, you should embed it below grade by 7 to 8 inches. Factor that in before you start counting rows or you’ll end up with a wall that comes in a bit short. 

Calculating The Right Number Of Blocks For A Retaining Wall

Here’s the step-by-step process laid out plainly. 
Step one: measure your wall length and height. Both in feet for the wall area calculation. 

Step two: multiply length by height to get the wall’s total square footage. 

Step three: take your block dimensions (in inches), multiply length by height, and divide by 144 to convert to square feet per block.

Step four: divide wall square footage by block square footage.

Step five: add your waste factor.

For example, if your retaining wall is 10 feet long by 3 feet tall, it’s 30 square feet. If your blocks are 16 inches long and 10 inches high, they’re equivalent to 1.11 square feet per block. Therefore you’d need about 28 blocks for your wall, before waste. 

It is recommended to buy at least 10 to 15% more materials than the exact number to account for any mistakes that may occur and any unexpected repairs. 

How To Measure For A Retaining Wall

Measuring seems like the easy part, and mostly it is. But there are a couple of details worth getting right the first time.

Length is straightforward: measure along the face of where the wall will run. If it has bends, measure each segment separately.

Height needs a bit more thought. Be sure to account for embedding the first course of blocks below grade when measuring the desired wall height. Accounting for this from the start will ensure that the wall does not end up too short.

If your wall is going to be 36 inches above ground, you want to plan for 4 to 6 inches below grade for the base course. Your total block height for calculation purposes is the above-grade height plus whatever you’re burying. Get that number right and the rest of the calculation follows. 

Cap Blocks: Don’t Forget The Top Row

Cap blocks are easy to forget until you’re finishing the top of the wall and realise you don’t have them.

They’re calculated based on length rather than area since they only run along one row at the top. Divide the retaining wall length by the cap block length. For example, using a 16-inch retaining wall cap block on a wall that is 144 inches long gives you 9 cap blocks needed.

If your wall has corners or a curved section, add a few extra cap blocks to account for those angles. Cap blocks often need cutting at corners and those cut pieces sometimes aren’t reusable. 

How Much Gravel Do You Need For Backfill?

Blocks are only part of what you need to order. The gravel backfill behind the wall is just as important and just as easy to underestimate.

Backfill is something that cannot be forgotten when building a retaining wall. It is crucial for keeping the wall steady as well as making sure it does not get eroded by water. It is recommended to use a granular material such as gravel. The backfill area’s height and length typically correspond to the wall’s height and length, and for thickness, it should be at least several inches.

Drainage gravel should be a 12-inch layer of clean crushed stone behind the entire wall face. A gravel base should be 6 inches deep and in a trench at least 24 inches wide.

Run the numbers before you order and you won’t be short on gravel when you’re mid-build. 

When To Hire A Professional For Your Retaining Wall

The DIY route works well for smaller walls. Once you get into taller or more structurally demanding builds, professional help earns its cost quickly.

Walls over 4 feet require professional engineering. A retaining wall calculator is an engineering tool that determines quantities of blocks, backfill materials, and drainage components needed for structurally sound retaining walls, incorporating safety factors, soil pressures, and building code requirements.

If your wall is near a driveway, a slope, or any existing structure, get a professional opinion before you start. The materials themselves aren’t that expensive. What’s expensive is pulling out a wall that wasn’t built right and doing it over. 

Retaining Wall Math Made Simple

The calculation is simple when you break it into steps. Get the wall dimensions right, know your block size, apply the waste factor, and don’t forget the gravel. Those four things cover the basics of any block retaining wall project.

If your wall is on the larger or more complex side, a professional is always worth talking to. But for most residential builds, the math is manageable and the project is within reach. 

Effective Snow and Ice Removal Tips for Homeowners

Snow removal is one of those winter tasks that gets harder the longer you wait. Fresh snow is light and manageable. Snow that’s been walked on, rained on, and frozen overnight is a different problem entirely. These snow removal tips are built around the same principle: act early, use the right tools, and don’t leave anything until the storm is over. 

For most Canadian homeowners, snow removal is a seasonal reality that comes around every year without much surprise but somehow still catches people unprepared. The right approach isn’t complicated. It’s just consistent. Here’s what that looks like across every part of your property. 


Why Timely Snow Removal Matters 

Leaving snow too long creates two separate problems. The first is safety: compacted snow turns to ice and ice causes falls. The second is property damage. Snow left sitting too long expands cracks in concrete. When snow melts during the day and freezes overnight, it widens small cracks. Over time, this leads to costly driveway repairs. 

Speed matters because time works against you. Snow that sits gets compacted by footsteps and freezing temperatures. What could have taken ten minutes early can turn into an hour of backbreaking work later. 

There’s a simple reason experienced homeowners clear snow early: it’s easier. Clearing early reduces physical strain and lowers injury risk. It keeps snow from bonding to pavement before overnight refreezing and prevents thick ice buildup that later requires chipping. 

On top of that, there are local bylaws to think about. In most Ontario municipalities, sidewalks need to be cleared within a set window after snowfall ends. Getting it done early keeps you compliant and keeps your property safe. 

Best Snow Removal Tips For Homeowners 

Start before the storm ends. Waiting until snowfall stops means dealing with a full accumulation all at once. One of the most popular mistakes made by homeowners is to put off getting a 

shovel until the storm is past. Snow is typically compacted, heavy, and considerably more difficult to remove by that point. 

Clear in stages during longer storms. A quick pass every few hours during heavy snowfall keeps the total volume manageable and prevents compaction. 

When you do shovel, push snow rather than lift it where possible. Use your legs rather than your back. Stretch before you start and take breaks during long sessions. Clear the snow in small piles rather than in large ones to avoid straining your body. Push the snow instead of lifting it, using your legs, knees, and arms rather than your back. 

It’s a smart rule of thumb to tackle snow removal before snow starts to accumulate significantly. This helps reduce time spent outdoors and allows you to remove snow in stages to keep walkways and your driveway clear. 

Once you’re out there, work methodically. Clear a path from the door first so you have an exit route. Then work outward. Push snow to the sides rather than piling it somewhere it’ll need to be moved again. Get snow off walkways before it gets packed down. First choice is to get all the snow off the walk as it’s falling, and also get it far enough back so when it melts it just doesn’t migrate back and freeze on the walk. 

Snow Blower Tips For Faster Snow Removal 

A snow blower covers ground much faster than a shovel and saves a lot of physical strain. But there are a few things worth knowing to get the most out of it. 

Don’t wait for the storm to fully stop before you use it on a heavy snowfall. Running it in passes during a storm keeps the total depth manageable and prevents the kind of packed, heavy accumulation that slows a blower down. 

If you plan on using a snow blower, try using it on flat surfaces like a driveway and avoid using it on steep steps. 

Point the chute away from cars, windows, and the road. Blowing snow onto a public road can create hazards and, in some municipalities, it’s actually against local rules.

Roof Snow Removal Tips 

Roof snow removal is one area where being cautious with your own safety and cautious with the roof surface both matter. 

Removing snow from a roof is an operation which is hazardous both for the person on the roof and for anyone who circulates near the house. Besides the risk of a fall, consider the proximity of any electrical wiring and installations. 

For most residential pitched roofs, a telescoping roof rake from ground level handles the lower section safely. If snow is deep, wet, or ice has formed, or if your roof is steep, high, or difficult to access, it’s best to contact a professional service. Always prioritise personal safety over speed or convenience. 

If ice dams persist, it could be a result of poor insulation in the attic or the highest floor of your home. Consult a professional about checking your attic insulation and roof ventilation. 

Eco-Friendly Snow Removal Solutions

Using less salt, and smarter, is one of the simpler changes a homeowner can make to their winter routine. 

Salt damages concrete and asphalt over time, particularly through repeated freeze-thaw cycles where it speeds up the expansion and contraction process. It also affects grass and plants along driveways and walkways. 

Alternatives like calcium chloride, sand, and eco-certified ice melt products work effectively with less collateral damage. Applying de-icer before a storm rather than after means you need less of it overall, because it’s preventing bonding rather than breaking through ice that’s already formed. 

When To Hire Professional Snow Removal Services

Hiring professional snow removal isn’t just for people who can’t manage the work themselves. It’s also for people who’ve decided their time is better spent elsewhere, or whose property is large enough that DIY is genuinely impractical. 

Seasonal contracts are usually better value than one-off calls. You pay a flat rate for the season and the crew comes out after each storm. For homeowners in areas with heavy or unpredictable snowfall, that predictability has real value on top of the convenience. 

You won’t have to worry every time snow is predicted since you’ll know that your property is protected. 

Tools Every Homeowner Should Have For Snow Removal

You don’t need an elaborate setup, but the right tools make a real difference. 

An ergonomic snow shovel with a curved or adjustable handle reduces back strain. In addition to shovels and snowblowers, keep ice scrapers, ice chippers, and roof rakes on hand to manage ice buildup on vehicles, walkways, and roofs. 

A roof rake with an extendable handle lets you clear the lower section of the roof safely from the ground. Ice melt or a de-icing product suited to your surface type. And for driveways over about 

50 feet, a snow blower is worth the investment for anyone who regularly deals with heavy snowfall. 

The basic kit for any homeowner who handles their own snow removal: 

A good ergonomic shovel designed to push rather than lift. A roof rake with a telescoping handle for clearing roof edges. An ice chipper for breaking up stubborn frozen patches. Ice melt or sand for traction after clearing. Warm, non-slip gloves and boots with grip. 

Prepare Early, Clear Smart, and Handle Winter With Less Stress

Winter is easier when you’re not reacting to it. Act before the storm, act during it if it’s heavy, and act right after rather than leaving things to harden overnight. The snow removal tips here are all built on that same logic. 

Take care of the roof, not just the driveway. Use eco-friendlier products where you can. And build a stock of what you need before the season starts so you’re not scrambling for a shovel when there’s a foot of snow outside. 

Build the habits, have the tools, know when to call in help, and Canadian winters become a lot less stressful. 

Why Cheap Retaining Wall Materials Can Cost You Double in Maintenance: A Contractor’s Honest Breakdown

Most people pick retaining wall materials the same way they pick most things: they look at the price tag and go from there. It makes sense on the surface. Why spend more than you have to?

The problem is that with retaining walls, the upfront price and the actual long-term cost are two very different numbers. A material that saves you money on day one can quietly become the most expensive decision you made, in repairs, replacement, and everything that goes wrong in between.

This guide breaks down what the different retaining wall materials actually cost, how long they last, what they need to keep working, and which ones are worth the investment. No sales pitch. Just a straight look at the numbers.

What Is The Strongest Retaining Wall Material?

From a pure structural standpoint, reinforced poured concrete leads the field. Poured concrete walls are often regarded as some of the most enduring options available for creating strong barriers, and owing to their robustness paired with low maintenance demands, they stand out as an exceptional choice. 

Natural stone takes a different kind of strength. Not engineered force resistance, but longevity. Stone walls built with proper footings and drainage routinely last well over a century. Mortared natural stone has a documented lifespan of 75–100+ years with low maintenance, making it one of the strongest long-term performers across both durability and maintenance.

Which one is stronger depends on what you mean by strong. For load and pressure: concrete. For lifespan and low intervention: stone.

Comparing Retaining Wall Material Costs

The cost range across retaining wall materials is wide, and the difference between options isn’t just about aesthetics or quality. It reflects genuine differences in what you’re getting.

Retaining wall installation costs $3,194 to $9,200 for a two-to-six-foot wall, depending on height and material. Within that range, material choice is one of the biggest variables. Timber pulls the cost down. Natural stone and poured concrete push it up. Concrete block sits in the middle and handles most residential situations well.

The number that matters more than the install cost is the cost per year of useful life. A wall that lasts twice as long for 30% more money is the better deal. It just doesn’t look that way on the initial quote.

Concrete Blocks Vs Natural Stone: Which Lasts Longer?

On pure lifespan, natural stone has the edge, and it’s not a small one.

Natural stone walls last 75–100+ years, the longest documented lifespan of any standard retaining wall material. Concrete block, installed properly, runs 40–75 years. Both outlast timber significantly, but there’s a meaningful gap between them.

The practical question is whether the additional lifespan justifies the additional cost. For high-visibility areas, premium properties, or situations where you genuinely don’t want to revisit this project in your lifetime, stone makes the case. For most standard residential applications, concrete block delivers a long, reliable service life at a more manageable cost. Timber is cheapest upfront, but concrete block offers the best balance of affordability and lifespan.

Best Retaining Wall Material For Sloped Yards

Sloped yards ask more of a retaining wall than flat ones, and that affects which material makes sense.

The main concern on a slope is combined pressure: soil load plus water movement. A material that handles both well is what you need. Concrete block and poured concrete are the most reliable performers here. Stone works well where the slope is moderate and aesthetics matter. Timber is the riskiest choice on any significant slope because it degrades faster when moisture is consistently present, and on sloped sites, moisture management is always a factor.

If the ground is sloped, there’s substantial additional labour involved, which can increase labour costs by 50% or more, with contractors needing to do significant extra excavation to build step-downs or to terrace the slope to accommodate a safe retaining wall. The material you choose also affects how that additional work gets done.

Drainage Mistakes That Destroy Retaining Walls

More retaining walls fail because of drainage than because of material choice, structural design, or anything else. It’s the most common problem and one of the most preventable.

The most common cause of retaining wall failure is poor drainage. Water that accumulates behind the wall increases pressure and can cause cracks or collapse, especially in materials like wood or concrete blocks.

The mistakes that lead here are usually simple ones: no gravel backfill, no drainage pipe at the base, weep holes that get clogged and never cleared, or a wall built without anyone considering where the water coming off the slope above is actually supposed to go. Each of these is avoidable with proper planning. None of them are expensive to get right upfront. All of them are expensive when they cause a wall to fail.

Retaining Wall Height Rules And Permits

Height is the factor that most often determines whether you need a permit, and a lot of homeowners find this out after the fact.

The International Building Code requires permits for earth-retaining structures over 4 feet specifically because failure risks jump dramatically at this threshold. In practice, many municipalities set the threshold at three feet. Some require permits regardless of height if the wall is near a property line or an existing structure.

Most municipalities or counties have requirements for permits for a retaining wall beyond a certain height, usually three or four feet. Avoiding the permit process can result in hefty fines, required removal, or legal action.

Walls above four feet also typically require engineering involvement, a licensed professional who can assess the soil conditions, specify the materials, and sign off on the design. This adds cost and lead time to the project, but it’s not optional where the requirement applies.

Common Retaining Wall Failures Homeowners Face

The failures homeowners run into most often come from a short list of recurring causes.

Drainage is at the top. Retaining walls are not maintenance-free; drainage outlets clog, minor erosion occurs, and vegetation grows, and ignoring early warning signs such as cracks, bulges, or ponding water allows small problems to become major failures.

Base preparation is the second most common issue. A wall without an adequate foundation shifts as the soil beneath it settles and moves. Inadequate reinforcement, particularly in taller walls, leads to the gradual outward lean that signals the structure is carrying more than it was built to handle. And then there’s the permit and engineering issue, walls built without professional input in situations that warranted it. Red flags warranting professional involvement include prior wall failures on the property, plans for multi-level terraces, or uncertainty about soil conditions. Read More: Retaining Wall Maintenance Tips

Environmental Impact Of Different Retaining Wall Materials

The environmental picture for retaining wall materials breaks down mainly around production impact, chemical treatment, and end-of-life considerations.

Natural stone produces the least concern across all three. It’s quarried rather than manufactured, carries no chemical treatment requirements, and is indefinitely durable. Concrete involves higher production emissions but is long-lived and partially recyclable. Timber is renewable at the source but often chemically treated, and it degrades faster, meaning more frequent replacement and the waste that comes with it.

For projects near vegetable gardens, water features, or ecologically sensitive areas, these distinctions matter more than they might on a standard residential build. The material that lasts longest generally has the lowest environmental cost over the life of the wall.

Best Retaining Wall Base Material For Stability

Whatever material the wall is built from, the base it sits on determines how long it stays where it was put.

Compacted gravel, typically crushed stone in the 3/4-inch range, is the standard base material for most block and stone retaining walls. It compacts well, drains well, and gives the first course of the wall something stable and level to sit on. Poured concrete walls use a concrete footing instead, sized and reinforced to match the load the wall will carry.The backfill behind the wall deserves the same attention as the base beneath it. Using the wrong type of backfill or failing to compact it properly can lead to structural issues; well-graded gravel or crushed stone should be compacted in layers to ensure stability. Getting both right at the build stage is far less costly than addressing either after the fact.

Which Retaining Wall Material Requires The Least Maintenance?

Low-maintenance retaining wall materials are ones that don’t need much intervention to keep doing their job year after year.

Poured concrete is probably the lowest-maintenance option in practical terms, occasional inspection for cracking, periodic checks on drainage outlets, and that’s largely it. Once installed, concrete walls require minimal upkeep aside from occasional inspections for cracks.

Natural stone is similarly undemanding once the wall is established. The mortar in mortared stone walls may eventually need pointing, but that’s a minor and infrequent job. Concrete block sits in the middle; well-maintained block walls need little attention, but the joints and caps should be checked periodically.

Timber needs the most active maintenance of any standard material and has the shortest lifespan regardless of how well you look after it. For anyone who wants a wall they can genuinely forget about, timber is the option most likely to disappoint.

When Should You Hire A Professional Contractor?

The DIY appeal makes sense; labour is a significant chunk of retaining wall cost, and a simple garden wall isn’t rocket science. But knowing where to draw the line matters.

Walls under three feet, on flat or gently sloped sites, away from structures, and with straightforward soil conditions are reasonable candidates for a competent DIY approach. Once you’re past any of those conditions: height, slope, soil complexity, proximity to structures, the risk of getting something wrong outweighs the labour saving.

Effective walls require quality blocks or stone, proper drainage, and good base preparation. On smaller budgets, designs that are less complex save money without sacrificing structural integrity. A contractor who does this regularly brings knowledge about local soil conditions, drainage requirements, and what actually holds up in your specific climate. That knowledge is difficult to replicate from research alone, and on a structural wall, it’s what stands between a wall that lasts and one that fails. 

Build It Right Once

If there’s one thing this breakdown points to, it’s that retaining wall material selection is really a long-term cost decision, not a short-term one.

The materials that look expensive upfront often look like the sensible choice five or ten years in. The ones that look like savings at the quote stage have a habit of generating their own costs over time. Getting drainage right, preparing the base properly, matching the material to the soil and load conditions, and respecting height and permit requirements. These are the things that determine how the investment performs.

Build it right once. That’s almost always cheaper than building it twice.

What Excavation Contractors Actually Handle on Real Construction Sites (Beyond Just Digging)

Ask most people what an excavation contractor does and they’ll say something like “moves dirt around.” Which, fair enough. That’s what it looks like from the road.

But spend a day on an active excavation site and the picture gets a lot more complicated. There’s soil testing, utility locating, drainage engineering, grading calculations, permit coordination, and a dozen conversations happening between the excavation crew and every other trade waiting for the site to be ready. The digging is actually one of the simpler parts.

This guide covers what excavation contractors really do, from the moment they first walk a site to the day they hand it over to the next crew.

What Services Do Excavation Contractors Offer?

The list is genuinely longer than most people expect. Land clearing, grading, foundation digging, utility trenching, drainage systems, demolition, erosion control, access road construction, backfilling and compaction, and final site cleanup. Some companies specialise in one or two of those areas. Others handle all of it.

On a typical residential new build, one excavation company might clear the lot on Monday, test the soil Tuesday, dig the foundation mid-week, trench for utilities Thursday, and finish the rough grading by Friday. Then they come back after the foundation is poured to backfill and compact.

Excavating contractors’ responsibilities include site planning, excavation, land development and clearing, water management services, grading services, and foundation services.

Commercial projects add more layers. Road building, stormwater infrastructure, complex grading across large footprints, and environmental compliance work all fall under the excavation contractor’s scope on bigger jobs.

Site Preparation Explained

Site prep is the phase that separates a construction project that goes smoothly from one that runs into problems every other week.

It starts before any equipment arrives. The contractor walks the site. They note where the ground is soft. They check where the water moves when it rains. They figure out where the buried utilities are and how close they run to where the work needs to happen.

No matter how carefully a project is planned, excavation has a way of uncovering things nobody expected. Maybe there’s an old concrete slab buried under the soil. Maybe the dirt suddenly turns soft in one corner of the property. That’s when the experience of a local excavation company really matters.

Good site prep is the reason those surprises get handled without derailing the whole project.

Residential Vs Commercial Excavation

The difference between residential and commercial excavation isn’t just size. It’s the whole nature of the work.

Residential projects have a relatively defined scope. Dig here, grade there, trench for these utilities, backfill when done. Commercial projects have moving parts. The site keeps changing as work progresses. Different sections get prepared on different timelines to keep multiple trades moving.

Commercial projects must meet detailed zoning laws, environmental guidelines, and building codes. Ignoring these can cause significant legal and financial problems.

The regulatory and documentation requirements are also in a different league. What passes for acceptable record-keeping on a residential excavation wouldn’t come close to satisfying what’s required on a commercial build.

Land Clearing And Grading Services

Land clearing looks like the easy part. You bring in a machine, you knock stuff over, you haul it away. In practice it requires more planning than that.

The contractor needs to know which trees are coming down and which ones the property owner wants to keep. They need to know how to get the equipment in without damaging underground utilities. They need to know where the cleared material is going and whether any of it has value as recyclable or salvageable material.

The land is then graded to ensure it is level or appropriately sloped, which is essential for the stability and drainage of the structure being built.

Grading is where the real skill shows up. Reading how water moves across a site and shaping the land so it moves where you want it to go, rather than where it wants to go on its own, takes experience that isn’t learned from a manual.

Demolition And Excavation: How They Work Together

Think of demolition as clearing what’s above ground and excavation as dealing with what’s below it. They’re two phases of the same broader goal: getting the site ready for new construction.

The three main types of demolition are manual demolition, mechanical demolition, and implosion. Manual uses hand tools for smaller structures, mechanical relies on heavy equipment like excavators, and implosion uses controlled explosives for large buildings.

The excavator that tears down the old structure is often the same machine that digs the new foundation. The operator who handled the demolition knows the site better than anyone. That continuity has real value on complex sites where surprises are likely.

Equipment Used By Excavating Companies

Equipment selection on an excavation project is a practical decision based on what the site actually requires.

Bulldozers have large blades at the front used to push large amounts of soil and debris out of the way and are effective in clearing land and leveling the ground. Other specialised equipment like trenchers, skid-steer loaders, and track loaders can be used depending on the nature of the job.

Small residential projects might need nothing more than a mini excavator and a skid steer. Large commercial sites might have six or eight different machine types running simultaneously. The experienced contractor knows what to bring, which cuts down on delays from having to source additional equipment mid-project.

Safety Regulations In Excavation Work

The safety requirements around excavation work exist because the consequences of ignoring them are severe.

Trench collapse is probably the most well-known risk. A cubic yard of soil weighs somewhere around 1.5 tons. An unprotected trench wall doesn’t give you a warning before it comes down. The 5-foot rule requires that protective systems be used for trenches or excavations deeper than 5 feet to prevent collapse. This OSHA safety standard ensures workers are protected with proper sloping, shoring, or shielding.

Underground utility strikes are the other one people don’t think about enough. A mislocated gas line or live electrical conduit turns an excavation project into an emergency fast. The locate process before digging begins isn’t bureaucratic box-checking. It’s what keeps people from getting hurt.

What Happens Before Excavation Begins?

There’s more pre-work than most clients expect, and most of it happens before any equipment arrives.

The site gets walked and assessed. Soil conditions, drainage patterns, existing vegetation, and access routes all factor into the plan. Utilities get located and marked. This is non-negotiable before any digging happens.

Soil testing is necessary to determine the soil’s composition and stability and to ensure that there are no underground utilities or other hazards that could cause problems during the excavation process.

Permits get pulled. On most residential and all commercial excavation projects, permits are required before work starts. Equipment and crew get scheduled. Site access gets assessed to confirm what machinery can actually reach the work area. The contractor coordinates with the general contractor, the engineer, and any other trades whose work the excavation will affect.

By the time the excavator starts moving dirt, a significant amount of professional work has already happened. Most of it invisible to anyone who isn’t directly involved.

How Long Does Site Excavation Take?

The timeline question gets asked constantly and answered vaguely almost as often. Here’s the honest version.

Simple residential excavation work on a clean site with good access and no subsurface surprises can be done in a day. A full site prep package for a new residential build usually runs somewhere between three days and two weeks depending on what’s involved. Commercial work varies too much to generalise meaningfully.

What matters more than the headline number is how the contractor handles the unexpected. Construction plans look neat on paper. The ground rarely stays that neat. Experienced crews adjust rather than stopping everything when conditions change mid-project.

A contractor who builds reasonable contingency into their timeline and communicates clearly when conditions affect the schedule is far more valuable than one who promises a hard date they can’t keep.

Signs You Need A Professional Excavation Contractor

A few situations make the decision pretty clear.

You’re building anything permanent. The ground under a permanent structure needs to be prepared correctly the first time.

The site has drainage issues or problematic soil. These are not problems that fix themselves and they’re not problems that a non-specialist is well-equipped to solve.

The work is near existing buried utilities. This one is a safety issue before it’s anything else.

Excavation contractors play a pivotal role in construction projects by clearing sites, removing debris, grading land, and preparing it for building. They collaborate closely with general contractors to schedule equipment and crew, ultimately shaping the ground for sturdy building foundations.

The cost of professional excavation is real. The cost of undoing the damage from unprofessional excavation is usually higher.

Questions To Ask Before Hiring An Excavating Company

The questions you ask before hiring an excavation contractor are how you find out whether you’re hiring someone good or someone who just has decent-looking equipment.

Are you licensed and insured for this type of work in this area? This one is not optional. If something goes wrong on your property, you need to know you’re covered.

What’s your experience with projects like mine specifically? A contractor who has built a career on commercial road grading is a very different hire from one who has spent years on residential site prep. Both might be excellent at what they do. That doesn’t mean they’re both the right choice for your project.

How do you handle unexpected conditions on site? The answer tells you a lot. Experienced contractors have a process. Less experienced ones often don’t.

What does your quote actually cover and what isn’t included? Permit fees, soil disposal costs, drainage materials, and base preparation are all real costs. A quote that doesn’t mention them probably hasn’t accounted for them either.

“That invisible, unnoticed performance is what experienced excavation contractors deliver…”

Most people on the finished project will never think about the excavation phase at all. That’s exactly what good excavation work looks like from the outside. The drainage works without anyone noticing. The foundation sits on stable ground without anyone thinking about it. The utilities are exactly where they’re supposed to be.

That invisible, unnoticed performance is what experienced excavation contractors deliver when the work is done right. It’s worth taking the time to find one who knows what they’re doing.

The Hidden Physics of Armour Stone: Why the Upfront Cost Saves Your Shoreline in 10 Years

Most people looking at armour stone retaining walls for the first time have the same reaction: that’s a lot of money for some rocks.

It’s a fair thought. Armour stone sits at the higher end of retaining wall costs, and on a quote sheet it can look hard to justify compared to concrete block or timber alternatives. But that comparison only holds up if you’re looking at the first year. Stretch the view out to five, ten, or fifteen years, especially on a sloped property, a waterfront lot, or anything dealing with Ontario’s freeze-thaw cycles, and the numbers start telling a different story.

This guide breaks down what armour stone actually is, how it works, what it costs, and why the upfront investment tends to look smarter the longer you own the property.

What Is An Armour Stone?

Armour stone is exactly what it sounds like: large, heavy, natural rock used as a structural and protective material. It’s typically quarried limestone or granite, cut into blocks that weigh anywhere from a few hundred pounds to several tonnes per piece.

Most armour stones range from 0.5 to 2 tons per piece. That size and weight isn’t incidental, it’s what makes armour stone effective at holding soil, resisting wave action, and staying in place through the kind of freeze-thaw cycles and frost pressure that Ontario winters deliver year after year.

In residential landscaping, it’s used for retaining walls, garden edging, steps, water features, and shoreline protection. In commercial and municipal settings, it’s a standard material for erosion control and waterfront infrastructure.

Armour Stone Vs Concrete Retaining Walls

Concrete and armour stone are both serious retaining wall materials, but they’re built on different principles and suited to different conditions.

Concrete relies on engineered reinforcement and monolithic structure to resist lateral pressure. It’s strong, predictable, and versatile in terms of form. The trade-off is that water management has to be designed explicitly, weep holes, drainage pipe, gravel backfill. Armour stone does not crack, shift, or deteriorate and supports large soil and water loads. Its stacked, dry-laid construction drains naturally, which is a significant advantage on wet sites, waterfront properties, and anywhere frost heave is a recurring concern.Armour stone costs $40–$100 per square foot installed, making it a premium choice for robust, long-lasting retaining walls. Concrete sits lower on cost for most standard installations. But on sites where drainage complexity, shoreline exposure, or long-term aesthetics matter, armour stone often delivers better value over the life of the wall.

Best Uses For Shoreline Armour Stone Walls

Shoreline applications are where armour stone genuinely earns its price premium over other materials.

Waterfront properties in Ontario deal with a specific combination of stresses: wave action, ice pressure, water level fluctuation, frost heave, and the constant moisture exposure that degrades timber and concrete over time. Shoreline properties are prone to erosion, wave impact, water deterioration, soil loss, and ice pressure. Armour stone and revetment rip rap acts as a natural barrier that absorbs energy and prevents these conditions from damaging land or built structures.

Unlike concrete seawalls, which reflect wave energy, often accelerating erosion in front of the wall, armour stone absorbs and dissipates it. That means less secondary damage to the surrounding shore. For cottage properties on Ontario lakes, properties along rivers, and any waterfront where ice movement is a seasonal reality, armour stone is consistently the most durable and lowest-maintenance option available.

How Heavy Are Armour Stones?

Armour stone is genuinely heavy, not in the way landscaping blocks are heavy, but in the way that moving them requires machinery.

Most armour stones range from 0.5 to 2 tons per piece. The pieces used for garden borders and lower decorative walls are at the smaller end. Full structural wall and shoreline protection blocks are typically in the 1–3 tonne range.

That weight is the core of how armour stone works. It doesn’t rely on reinforcement rods, mechanical connectors, or adhesive to stay in place. The mass of each stone, combined with correct stacking and a solid compacted base, creates a structure that resists pressure simply by being too heavy to move. Building an armour stone retaining wall isn’t a weekend DIY. It takes equipment, planning, and knowledge of proper drainage and structural support.

Drainage Requirements Behind Armour Stone Walls

One of armour stone’s practical advantages is that water can escape through the gaps between stones rather than building up as pressure behind a sealed face. But the drainage system behind the wall is still a critical part of the build, not an optional extra.

One of the most common causes of retaining wall failure is inadequate drainage, which leads to hydrostatic pressure buildup behind the wall. A compacted gravel backfill layer, a perforated drainage pipe at the base, and geotextile fabric to prevent soil migration into the drainage layer are the standard components of a correctly built system. 

Proper drainage, gravel, pipes, and fabric, adds $15–$60 per linear foot but saves thousands in potential collapse repairs. On any waterfront or high-rainfall site, that cost is not optional.

Common Mistakes In Boulder Retaining Wall Installation

Most armour stone wall problems trace back to a short list of installation errors, and most of them happen before the first stone goes in.

Inadequate base preparation is the most common. A compacted gravel base is essential for distributing the weight of the stones and preventing settling over time. A compacted gravel base is crucial to help support the heavy stones and prevent settling over time. Skip it or underbuild it and the wall shifts, often within the first couple of winters.

Poor stone selection for the application is another recurring issue. Smaller stones placed where larger ones were needed, or mixed sizes stacked without structural logic. For armour stone, the largest rocks should be strategically positioned in the footing trench to create a low centre of gravity, using physics to ensure stability.

Drainage is the third. Even with armour stone’s natural permeability, the backfill system matters. Walls installed without proper gravel backfill and drainage pipe develop water pressure problems regardless of how well the stones are placed.

How Long Do Natural Stone Retaining Walls Last?

Natural stone walls last as long as anything in residential construction, and sometimes longer.

When installed professionally and maintained properly, armour stone retaining walls can last for 50 years or more. Some historic stone walls across Ontario and elsewhere have been standing for well over a century, which reflects what the material is capable of when the fundamentals are right. 

In practical terms for a residential installation in Ontario, a properly built armour stone wall should be a one-time build. The maintenance it requires, periodic inspection, clearing of drainage outlets, occasional weed removal between stones, is minimal compared to the intervention that timber or deteriorating concrete block eventually demands. Timber walls have a shorter lifespan, typically between 10–20 years, due to potential decay. That lifespan difference is a core part of the total cost comparison.

Residential Vs Commercial Armour Stone Landscaping

The distinction between residential and commercial armour stone work is mainly one of scale and regulatory complexity, not material performance.

For residential projects, armour stone is commonly used for backyard retaining walls, shoreline work on cottage and waterfront properties, feature walls, steps, and garden terracing. The projects are typically in the $5,000–$60,000 range depending on scope and site conditions. On average, prices for armour stone retaining walls can range from $40 to $100 per square foot, including materials and labour. 

Commercial installations involve larger volumes of stone, heavier equipment, more complex site logistics, and in most cases formal engineering and permit requirements. Municipal shoreline protection, highway slope stabilisation, and commercial landscape features are all common commercial applications. The material behaves the same way, it’s the project management, documentation, and scale that differ.

Cost Factors For Armour Stone Retaining Walls

Armour stone is a premium material and the cost reflects that, but the variables that drive the final number are worth understanding before you get quotes.

The cost of an armour stone retaining wall varies depending on factors such as the size of the wall, the type of stone, the design complexity, and site preparation. On average, prices can range from $40 to $100 per square foot, including materials and labour. 

Stone size is one of the bigger variables. Heavier stones cost more per tonne and require larger equipment to handle. Ontario suppliers list armour stone at $45–$239 per tonne. Heavier stones increase transport fees because most roll-off trucks max out at 14–16 tonnes per load.

Site access is another significant factor. If your backyard gate is narrower than 8 feet, crews must crane stones over the house or hand-dolly smaller pieces, both premium-priced scenarios. Excavation and compacted gravel base preparation add $8–$15 per square foot on top of the stone and placement costs. For walls over one metre in Ontario, engineering stamps and municipal permits typically add $1,500–$3,500 to the project total.

Can Armour Stone Be Used For Waterfront Protection?

Waterfront protection is one of armour stone’s strongest applications, and for Ontario cottage and lakefront properties, it’s consistently the recommended solution for serious shoreline work.

Benefits of armour stone shoreline protection include reduced erosion, long-term protection of foundations, docks, and waterfront structures, improved property appearance, and long-term property value retention.

The physics work in its favour at the water’s edge. The mass of the stone resists ice push and wave impact. The natural gaps between stones dissipate wave energy rather than reflecting it back toward the shore. And unlike timber, which deteriorates rapidly in the persistent wet-dry cycling of a shoreline environment, armour stone is unaffected by moisture. Waterfront retaining walls are not DIY projects. They require specialised knowledge of marine engineering and drainage. A failed wall can cause catastrophic damage.

Do Armour Stone Walls Need Footings?

Armour stone walls don’t need a poured concrete footing in the conventional sense, the weight of the stones provides the resistance that a footing would otherwise supply. But they do need a prepared base that functions like a footing in terms of stability and load distribution.

In practice, that means excavating firm, undisturbed ground, installing a compacted crushed gravel layer, and setting the first course of stones partially below grade. The depth below grade depends on wall height and local frost depth, for Ontario’s climate, getting the base below seasonal frost movement is important to prevent heaving over winter.

For armour stone, the largest rocks are strategically positioned in the footing trench to create a low centre of gravity. The mass and positioning of that first course is the foundation of everything above it, and it’s where most of the critical installation decisions are made.

Performance Over Time Matters

Armour stone isn’t the cheapest retaining wall option, and it’s not meant to be. It’s a material built for applications where performance over time matters more than minimising the initial quote.

On sloped Ontario properties, waterfront lots, and anywhere freeze-thaw cycles and soil pressure put real demand on a retaining structure, armour stone consistently delivers what lighter or less durable materials don’t: a wall that handles the conditions it faces without constant intervention. The upfront cost is real. So is the lifespan, the low maintenance demand, and the value it holds in the landscape over decades.

If you’re building something you genuinely don’t want to rebuild in ten years, armour stone is worth the serious look.

Excavation vs Grading: Key Differences Explained

When it comes to excavation vs. grading, a large number of people are very much confused. Why won’t they be? Apparently they seem like the same thing! Both equally use heavy machineries and move soil with the ultimate objective to get the land prepared. But what people don’t know is that excavation and grading have completely different purposes.

If you’re planning a construction project, managing land development, or just trying to figure out how building really starts, it’s crucial to know the difference between excavation vs grading.

You can think of it this way: one process digs deep and the other forms the surface. Let’s take it apart the right way.

What Is Excavation in Construction?

Before we can compare excavation vs grading, we need to have a clear idea of what excavation is.

Excavation is the process of digging up soil, rocks, or trash from the earth to make room for building. This is frequently done for basements, foundations, ditches, or utilities that are buried.

Digging is what excavation is all about.

‎This is important to know in order to understand the difference between excavation vs grading. Excavation happens at a deeper level and sets up the structural base.

Types of Excavation

Depending on the project, there are different types of excavation that can be used:

  • Trench excavation (for pipelines or cables)
  • Basement excavation (for building foundations)
  • Cut and fill excavation (balancing soil levels)

‎Each type has a different job to do in the overall process of digging and grading in construction.

Equipment Used in Excavation

Heavy-duty machines are needed for excavation, such as excavators, backhoes, and trenchers.

‎When comparing excavation vs grading, one of the most important things to look at is how well these equipment can dig and move enormous amounts of soil.

What Is Grading in Construction?

To get the land ready for building, grading is the process of levelling and contouring the surface. Grading is different from excavation since it doesn’t dig deep; instead, it makes a smooth, solid, and appropriately slanted surface.

Grading is very important for landscaping and drainage.

In the debate between excavation vs grading, grading is all about controlling the surface.

Types of Site Grading

‎There are two main forms of site grading:

  • Rough grading (initial shaping of land)
  • Finish grading (final smoothing and preparation)

‎Both of these stages are necessary to make sure that the land is graded correctly for building and long-term stability.

Equipment Used for Land Grading

‎Grading employs different tools than digging, such as graders, bulldozers, rollers.

In the contrast between excavation vs grading, these machines are clearly different because they focus on smoothing and levelling.

Excavation vs Grading: Key Differences

‎Now let’s get to the main point of comparing excavation vs grading.

Purpose

‎The main distinction between excavation vs grading is what they are used for.

‎Grading is about leveling and contouring the surface, while excavation is about digging and taking things away.

Equipment Used

‎Another important difference between excavation vs grading is the equipment used.

Excavation employs tools for digging, such excavators, while grading uses tools for levelling, like graders and bulldozers.

Stage in Construction

‎Most of the time, excavation comes before grading.

‎When you look at excavation vs grading, it’s crucial to know the order of the steps because they both depend on each other.

Impact on Drainage

‎Grading is very important for drainage since it makes sure that water flows away from buildings.

‎Excavation makes room, while grading makes sure that water doesn’t become an issue later. This is another important difference between excavation vs grading.

Excavation vs Land Grading

‎Some individuals use the words “land grading” and “grading” to mean the same thing.

‎When talking about excavation vs. grading, land grading is getting land surfaces ready for building or landscaping. It makes sure the slope is right, the structure is stable, and the area is usable.

How Excavation and Grading Work Together

‎Excavation and grading in construction don’t compete with each other; they operate together.

‎Excavation makes the deep structural base, while grading makes the surface smoother. There can’t be a foundation if you don’t dig. There is no proper finish without grading.

‎It’s best to conceive of excavation and grading as two aspects of the same system.

When Is Excavation Required?

‎Excavation is needed when building foundations, constructing basements, and installing underground utilities.

‎In many cases, excavating below ground level is necessary, which is why excavation is so important in the excavation vs. grading debate.

When Is Grading Required?

‎Grading is a very important step in getting your land ready for building and landscaping. It is needed to shape outdoor areas, level out uneven surfaces, and make sure water drains properly. If you don’t do grading properly, water can pool in places you don’t want it to, which can cause long-term problems with the structure. Grading is what makes sure that the land is solid, evenly formed, and ready for building or landscaping. This is important when comparing excavation with grading.

The Role of Soil Testing Before Excavation and Grading

‎Soil testing is an important stage that should not be skipped before starting either grading or excavation. Before digging, soil testing may tell you how strong the soil is, how much weight it can hold, and how much water it has. These things are important for knowing how the land will react to stress and changes in the environment. With proper soil data, both excavation and grading can be done safely, quickly, and with long-term durability in mind.

Common Mistakes in Excavation and Grading

‎Even teams who have done this before can mess up.

‎Some common problems are too much digging, bad grading slope, and not planning for good drainage.

‎To grasp the difference between excavation and grading and to have a successful project, you need to avoid these blunders.

Safety Risks in Excavation and Grading

‎There are safety issues with both techniques.

‎In case of implementing both, the soil might collapse, accidents can happen with any of the equipment, and the ground condition might be unstable.

‎Every step of the excavation vs. grading process needs to have the right safety precautions in place.

Cost Differences Between Excavation and Grading

‎The costs depend on the project.

‎Excavation usually costs more since it requires digging deeper and using bigger machines. 

‎Compared to that, grading will cost you less. Nevertheless, it will incur a cost that needs to be kept in your calculation as it is an unavoidable step.

‎If you know the cost difference, it will also help you to get a practical idea regarding excavation vs grading.

FAQs About Excavation and Grading

Which comes first: excavation or grading?

‎Excavation is usually the initial step in most building projects. Once the digging is done, grading is done to make the surface level and ready.

Can grading replace excavation?

‎No, grading can’t take the role of excavation. They both have different uses. For structural work, you need to dig, and for finishing the surface and drainage, you need to grade.

The Two Steps, Where It All Starts

‎At this point, you should be able to tell the difference between excavation vs grading.

‎Excavation is the process of digging and making space below earth, while grading is the process of shaping and levelling the ground. Both are important parts of building, and one can’t take the place of the other.

‎Knowing the difference between excavation vs grading not only helps you plan projects better, but it also makes sure that they are safe, stable, and efficient in the long run.

At the end of the day, great construction always starts with the ground up, and these two steps are where it all starts.